![]()
|
How to build a resin kit ! |
|
One of the biggest mysteries that is out there in the modeling community is how to Prep, paint and build a resin kit. I've recently built a number of them for different clients, and finally decided to document the step by step process. I'll do my best to explain each step as I go along, but bear in mind, everybody will and can do it different. By no means do I declare myself an expert! I'm just a 'not small' man hanging out in the back room with a knife and determination! |
|
First you clean! |
|
The real key and difference to doing a resin kit from normal type plastic or die cast kits is the preparation. When a resin piece is cast, the liquid mix is poured into a mold, which is usually covered in some sort of mold release. What kind will vary from different manufacturer, but needless to say you need to make sure you're piece is clean. Now sometimes I'll clean a cab after I've done all the sanding and drilling I'm going to do, but regardless, this must be done before the first prime coat. There are a couple of different ways to do it. One method is using lacquer thinner. Dip the piece into a jar of the stuff, leave it there only for a few seconds, take it out and dry it off using a cotton rag of your choice. DO NOT leave the piece sitting there for longer than a minute or so at the outside. The lacquer thinner is excellent for turning your piece into a blob of melted goo! My preferred cleaner is 'Westleys' Bleche White' a tire cleaner you can find at most auto parts stores. It's less caustic than the lacquer thinner, so you can set the pieces into a bowl of the stuff, and gently scrub it with an old toothbrush. After either method, wash the parts in warm soapy water..and rinse really well to remove any soapy residue. Now you're ready to work the piece over. |
|
Prep for parts! |
|
This next stage is really where you get to start having some fun. This is where you can avoid lots of hassle by planning ahead. What I like to do first is completely go over the piece with a set of needle files and sanding sponge. When a kit is poured, or shot into a die like styrene, there are small sharp edges and thin extra material that squeezes out of the edges of the actual piece itself. This is called flash, and it needs to go away! I usually cut away with a knife blade first, and then carefully sand all the edges square and clean. Pay particular attention to the windows, and bottom edges of the cab, fenders etc. The front of the TLC Peterbilt 379 kits have a small raised bump on the front leading edge of each that go fit around the grills that come with liberty classic or Spec cast Pete parts. I don't like them, so I sand them off as well. Once you've gone over the basic piece, line up ALL the parts you want to have on the finished rig. Make sure that each part fits where you want it easily. This is often referred to as 'dry fitting'. Drill all the holes for any extra lights on top, and the mirrors. These kits don't come with the peep window on the passenger side door. I draw a small rectangle with a pencil where I want it to go, and then using a drill bit, make a hole at the top of the rectangle, and at the lower end. Then, carefully work a knife down each side to connect the two circles, and BAM...small oval window. I also like to shave the visor back so the new stainless version fits flush how I want it...either straight out or dropped. Once you're satisfied, look it over really well again, then get ready to paint. |
|
Shake, rattle and roll! |
|
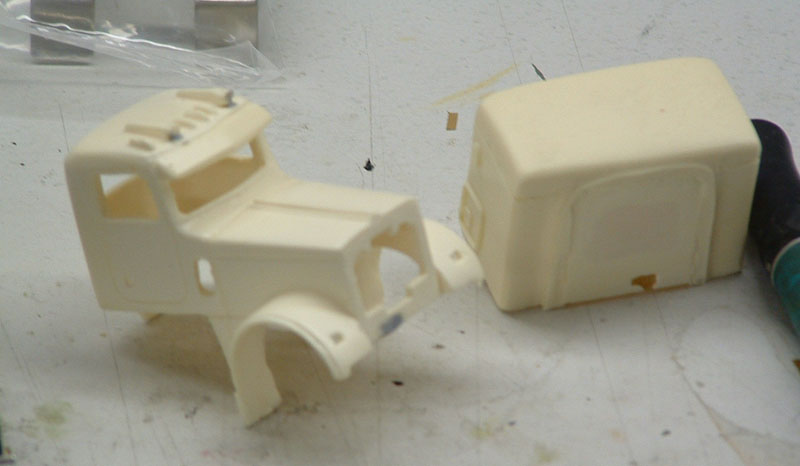
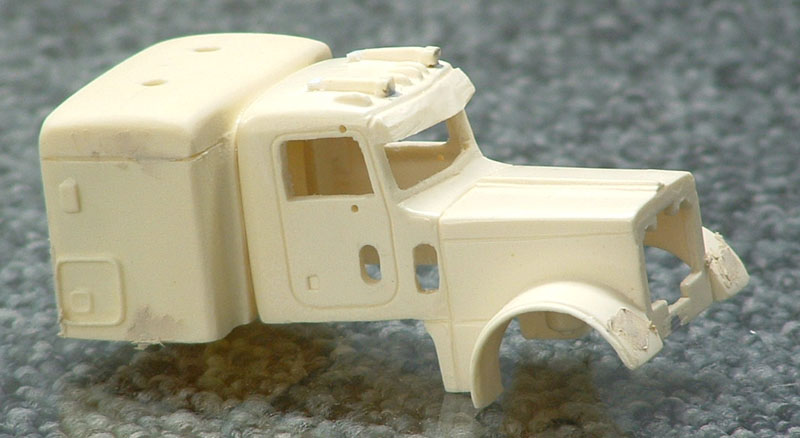
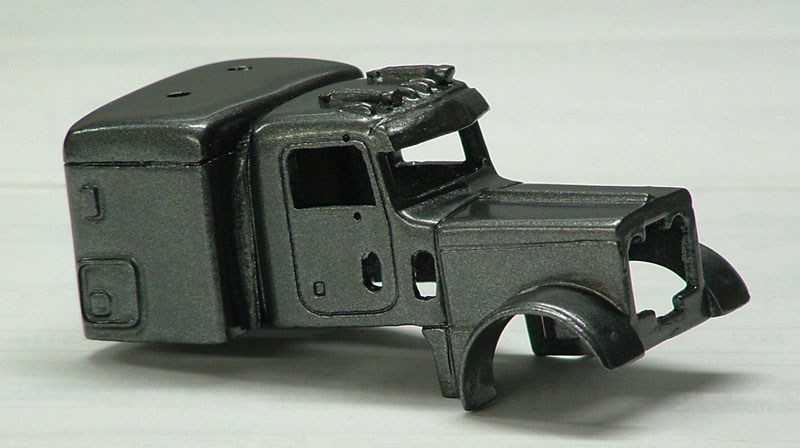
Painting is always a task people seem to be afraid of. Don't be, it's not rocket science. It just takes some practice and patience. The first thing I do right before painting is wipe the piece down with Isopropyl Alchohol (rubbing alcohol.) This removes all the grit, grime and oils put on their by your fingers. Then, I take a set of locking forceps and grab the the front support for the grill...anywhere that isn't going to be seen once you're finished. I'm a big believer in auto paint. Not enamel, but lacquer based, like the little type cans you see in auto part stores. I make sure and buy the same brand primer (sandable), color coat, and top clear coat. Brands vary, but the more common are Dupli-Color or Plasti-Kote. Now that you've got all the paint you're going to need, go outside where its ventilated. First, prime coat. I do one fairly solid coat to start. This really shows what voids or deformities are in the cab. Let the primer dry and then fill the holes or voids with your putty of choice. Some people use auto bondo, I like to use modelers putty, called Squadron White Putty. Regardless, fill in small amounts until the hole is filled, and sand lightly until flush. Now blow it off, and prime again. If after dry, the piece looks good, you're ready to color coat. There are a few different ways to do it, but I like to flood coat it. In short, you start beyond the piece, spray and move the paint across the piece, not stopping until you're past it. Heres' where the practice comes in. You want enough to have a good even glossy coat, but not too much so it runs. Let it dry, and do another coat. Finally, if all still is on track, top coat with at least once coat of the clear. This is just a basic article, so I'm not going to go into all the methods for two or three tone paint jobs. I'll save that for a later date. Below are some thumbnails that show each stage of the work on this particular cab. The first picture shows all the parts and pieces, and some of the tools I use before I begin. The second shows the cab before any of the prep work has been done. Note the flashing in the sleeper door that has to be removed. The third shot is after I've done all the sanding and filling, before sanding the filler. The last shot shows the cab ready to assemble.
|
|
|
|
|
|
|
Hope this has helped. I'll tackle an assembly article next time I build one, so I can really show some step by step assembly. |